Sweet contribution to a progressive dinner: Trio of Licorice Desserts… yummy!

Well, Carnaval is over, but the celebrations continue! The same week we offered a typical Brazilian Feijoada for a group of friends and their kids, our family celebrated the 5th Birthday of our Valentine’s Girl, with special ‘mommy-made’ cupcakes… and to top it all off, why not take part at a 16-couple Progressive Dinner? 😮

A bit of background: This type of moving feast offers hours of entertainment with a limited amount of prep work. It’s a great way to entertain a group of friends or neighbors without shouldering the whole responsibility (or cost) of a multi-course dinner party — all because a progressive dinner party was held at 16 different homes in succession, with a single course served at each one. In our case, we hosted Dessert.

IMG_5925

Well, Carnaval is over, but the celebrations continue! The same week we offered a typical Brazilian Feijoada for a group of friends and their kids, our family celebrated the 5th Birthday of our Valentine’s Girl, with special ‘mommy-made’ cupcakes… and to top it all off, why not take part at a 16-couple Progressive Dinner? 😮

A bit of background: This type of moving feast offers hours of entertainment with a limited amount of prep work. It’s a great way to entertain a group of friends or neighbors without shouldering the whole responsibility (or cost) of a multi-course dinner party — all because a progressive dinner party was held at 16 different homes in succession, with a single course served at each one. In our case, we hosted Dessert.

What was prepared for our special guests?

Considering I’m a mom of 3 very active little kids, with not a lot of ‘free time‘ on any given Saturday, cooking time had to be carefully planned, and all three desserts needed to be simple, easy and tasty. That said, had all kids in the kitchen during prep time, and before I knew it, Voilá – we’re done! ♥

A first-timer Trio of Desserts, each one including a different type of liqueur... [totally made that up… instead of going with one type of dessert for all guests, decided to try something different, and offer a light variety of flavors: dark chocolate, light caramel/’dulce de leche’ and a fruity option, with not-so-sweet elements, for a fresher taste. What’s the deal with the different kinds of liquor – Rum, Kahlua [coffee liqueur] and Brandy? It’s part of the fun… something unusual, something to talk home about!]

Besides the ‘sampler desserts’, guests had an opportunity to enjoy some freshly brewed Brazilian coffee!

Results?

IMG_5923


Liquorish mix of fruits:

Peaches, raisins in rum, Maraschino cherries [as wished], and caramelized peanuts, as the ‘crunchy element‘…


IMG_5920


Dark chocolate and Kahlua mousse


IMG_5924


Pudim de Dulce de Leche (Caramel Pudding) with Brandy

From our “Paceña Kitchen”, to yours… 😮 Curious about the simple & easy recipes? Send me a comment with your email and I’ll be happy to share the tips to all “busy bees” out there! 

More about “getting high on cupcakes”!

Taking up on another cooking challenge: our middle daughter’s Valentine’s birthday… and nothing could go better than… cupcakes! ♥ Scrumptious, rich, vanilla-based, topped with chocolate frosting or a simple butter cream… Both my oldest kids (7 and 5) had a blast ‘helping me’ decorate the mini cakes! They came up with interesting choices for toppings – scroll down to check the pics out! I guess, at the end, it all worked well…

That said, for this Friday, I’m getting back into baking. High altitude [and attitude!] baking.

IMG_5873
Cupcake Cocktails? 😮

My ‘transcontinental’ margarita cupcakes: approved by Brazilians, Mexicans & Americans!

Taking up on another cooking challenge: our middle daughter’s Valentine’s birthday… and nothing could go better than… cupcakes! ♥

Scrumptious, rich, yellow cake, strawberry and vanilla-based, topped with chocolate frosting or a simple butter cream…

Both my oldest kids (7 and 5) had a blast ‘helping me’ decorate the mini cakes! They came up with interesting choices for toppings – scroll down to check the pics out! I guess, at the end, it all worked well…

That said, for this Friday, I’m getting back into baking. High altitude [and attitude!] baking.

IMG_5868
cupcake tower keeps getting higher and higher! 😮

Moving on to the preparations. Simply followed regular yellow cake and vanilla recipes [oh, you, Martha Stewart!], as well as, a simple lemon pound cake recipe, and a fantastic recipe for strawberry cupcakes, from Yummy Cakes from Lynn, discovering [through extensive online research] a few tips/adjustments for baking at high altitudes.

La Paz, Bolivia, can be a great example of how frustrating it might be for a rookie baker! In order to remain in good terms with my kitchen oven, my ‘overactive kids assistants and I’ decided to go for a ‘new & improved first-timer’ cake (batter) step-by-step: 😮

Flour: Increased by 2 Tbs per cup of batter

Baking Powder/Soda: Decreased by 1/4 tsp per tsp of mix

Sugar: Decreased by 2 Tbs per cup of mix [we’re always advised to go light on the sugar here, it’s healthier and better for the body’s blood pressure…]

Milk: Increased by 2 Tbs per cup of mix

Extra egg: added one more to the usual 3

Oven Temperature: Increased by 25 degrees

Baking Time: Decreased by five minutes per 30 minutes of baking time.

It looks like a lot of math, right? Adding this, subtracting that…. raising the oven temperature, decreasing the baking time… But it all makes sense – you’re looking for a less ‘runny’ cake mix/batter, and with  hotter oven, it’s logical (!!) to leave your ‘lovies’ in there for less time. At the end, it’s all about a great deal of TLC! ♥

Curious about the results?

Take a look, and let me know how you think this Valentine’s Birthday Bash went with another batch of the ‘highest cupcakes I’ve ever baked’! 😮

IMG_5875

IMG_5877

IMG_5878

In the mood for still more? Take a look at these unique recipes for high altitude baking: from my kitchen to yours! ♥

Cupcakes filled with ‘dulce de leche’ (very popular in Latinamerica, similar to caramel)

Below, strawberry cupcakes, filled with fruit (jam) and topped with ‘bubble gum’ frosting [just came up with this recipe today… let me know if you’re curious about it!]

cupcakes topped with caramel

Related articles

Illustrated ‘Bolivian-style’ adapted cooking: Green Bean Casserole!

Now, updated with the promised images! Great fit for this week’s photo theme, as well. How I love coincidences!

Enjoy!

Here is my ‘adapted’ recipe:

Green Bean Casserole, “Bolivian-Style”, totally vegetarian!

Ingredients:

1 cup and some 5 oz of 1 can CAMPBELL’S® Miranda Family’s Kitchen homemade Cream of Mushroom Soup

3/4 cup milk

1/8 tsp. black pepper

2 (9 oz. each) pkgs. frozen cut green beans, thawed* 1/2 kg (1 pound and some 4 oz) of freshly cut, cooked [with a bit of salt] green beans

1 1/3 cups FRENCH’S® Original or Cheddar French Fried Onions homemade onion rings (yeah, that one, where you beat one egg with 3 Tb spoons of all-purpouse flour, and a bit of salt!) [hopefully, it’ll do the trick… gotta be original, at least!] 😮

Directions:

MIX soup, milk and pepper in a 1 1/2 – qt. baking dish. Stir in beans and 2/3 cup homemade onion rings (see the images for a real shock on my recently-discovered cooking skills!) 😮

BAKE at 350°F 375°F for 30 35 min.

STIR. Top with remaining 2/3 cup of onion chips/rings. Bake for some 5 min. or until onion chips are golden.

Liked the results? What about my first-time homemade onion rings for the topping? ♥

Related articles

Images and instructions for ‘Bolivian-style’ “camote” casserole [Thanksgiving cooking].

The last days of this week are all dedicated to my ‘adventures in the kitchen’… all the perks of a mom of 3 little ones! Again: pre-Thanksgiving recipes! [Using a kids’ school event as the perfect excuse for trying things out!] Ohh, the wonders of life in the foreign service…. 😮 Already shared my semi-successful attempt to make the well-know Green Bean Casserole. I guessed, it worked well – jury’s still out there! Note: NEVER MADE IT BEFORE…. Now it’s time to try it in ‘breathless La Paz”! Here is my ‘adapted’ recipe:

detail, Bolivian sweet potato (camote)
The last days of this week are all dedicated to my ‘adventures in the kitchen’… all the perks of a mom of 3 little ones! Again: pre-Thanksgiving recipes! [Using a kids’ school event as the perfect excuse for trying things out!] Ohh, the wonders of life in the foreign service…. 😮 Already shared my semi-successful attempt to make the well-know Green Bean Casserole. I guessed, it worked well – jury’s still out there! Note: HAD NEVER MADE IT BEFORE…. Now it’s time to try it in ‘breathless La Paz“! Here is my ‘adapted’ recipe:

‘Camote’ Casserole with Marshmallows, “Bolivian-Style”

1 (16 oz.) can sweet potatoes 1/2 kg (around 1 pound) of Camote, bought today at my dear neighbor, the Achumani Market
1/2 c. brown sugar
1/4 tsp. salt
1/2 tsp. cinnamon
1 egg, beaten
4 tbsp. melted butter
1 pkg. marshmallows

Step 1: Get the ‘sweet potatoes’ (camote) ready: cooked, peeled.

cooked and peeled ‘camotes’ (Bolivian sweet potato)

Step 2: Mix (potatoes, cinnamon, brown sugar, egg, butter) in a buttered baking tray, topped with slices of white marshmallows. Place 1/2 of mixture in dish. Dot with marshmallows, then add remaining mixture. Bake at 350 375 degrees for 30-35 minutes. Remove from oven, dot top with marshmallows and replace in oven about 10 minutes or until brown.

after baking for 30 mins, cover the top layer with marshmallows, and allow them to melt for about 10 mins in the oven… hummm!

Everyone loves a Fall Bake Sale!

Well, I already shared here my very first attempt to make Apple & Cinnamon Muffins for my kids school – a humble contribution to a great initiative to have a Fall Bake Sale, even though it feels like Fall, here in La Paz, Bolivia, we’re officially in the middle of Spring… Here is what I spotted during my time there, giving a hand to the other moms and enjoying a fantastic Pumpkin Latte (gotta get that recipe!) 😮

Getting ‘high’ on [apple & cinnamon] muffins!

Again: my path towards learning how to bake goods in high altitude settings…

Another fundraising bake sale, and, this time, the theme is “FALL BAKE” [even though it’s Spring here!].

La Paz, Bolivia, can be a great example of how frustrating it might be for a rookie baker! In order to remain in good terms with my kitchen oven, ‘we’ decided to go for this ‘new & improved first-timer’ apple muffin mix, step-by-step: 😮

It yields between 12 and 15 muffins. The recipe has already been adapted to the altitude so I should have no problems with it, right? 😮

Again: my path towards learning how to bake goods in high altitude settings…

Another fundraising bake sale, and, this time, the theme is “FALL BAKE” [even though it’s Spring here!]. This week is all dedicated to my ‘adventures in the kitchen’… all the wonders of a mom of 3 little ones! 😮

La Paz, Bolivia, can be a great example of how frustrating it might be for a rookie baker! In order to remain in good terms with my kitchen oven, ‘we‘ decided to go for this ‘new & improved first-timer’ apple muffin mix, step-by-step: 😮 Following this post, I’ll share images from the actual bake sale, with all their goodies: caramel apple, pumpkin pies, pumpkin brownies, honey bread… hummm!

It yields between 12 and 15 muffins. The recipe has already been adapted to the altitude so I should have no problems with it, right? 😮

APPLE MUFFINS
1/2 tsp baking soda
1/2 tsp salt
1/2 cup butter, softened
3 eggs
1 1/4 tsp vanilla extract
1 cup milk
1 1/2 cups chopped apples
For the topping:
1/3 cup brown sugar, packed
1 tbsp all purpose flour
1/8 tsp ground cinnamon
1 tbsp butter
Preheat the oven to 375 F. Prepare muffin tins.
In a medium bowl mix flour, baking powder, baking soda and salt.
In a large bowl beat butter, sugar and eggs until smooth. Mix in vanilla extract and milk.
Stir in the chopped apples and gradually mix in the flour mixture. Spoon into prepared muffins tins.
In a small bowl, mix brown sugar, flour and cinnamon. Cut in butter until mixture is like coarse crumbs. Sprinkle evenly over muffin batter in tins.
Bake 20 minutes or until toothpick inserted in the middle of muffin comes out clean. Remove from oven and let cool 5 minutes before removing muffins from tins and letting cool completely on wire racks. At the end, it’s all about a great deal of TLC! ♥

Curious about the results?

Related articles

Getting ‘high’ on cupcakes!

Taking up on a new cooking challenge: in order to help a fundraising bake sale, I’m getting back into baking. High altitude baking. That said, after having a long conversation with my [American] stove/oven, we came to the agreement that we’d become friends, not rivals.

If I’m able to get my mini cakes out, not deflated, nice looking, and attractive to someone else’s mouth, both of us would win: I’d promised to throughly clean it after I was done.

Strawberry cupcakes filled with ‘dulce de leche’ (caramel)
My ‘transcontinental’ margarita cupcakes: (tried and) approved by Brazilians, Mexicans & Americans!
my ‘assistant’…

Taking up on a new cooking challenge: in order to help a fundraising bake sale, I’m getting back into baking. High altitude baking. That said, after having a long conversation with my [American] stove/oven, we came to the agreement that we’d become friends, not rivals.

If I’m able to get my mini cakes out, not deflated, nice looking, and attractive to someone else’s mouth, both of us would win: I’d promised to throughly clean it after I was done.

Both of us [the oven and myself] smiled at the agreement [or at least I did, and maybe, in my crazy mind, my oven’s alter-ego did the same].

Moving on to the preparations. Simply followed a regular yellow cake recipe [oh, you, Martha Stewart!], as well as, a simple lemon pound cake recipe, and a fantastic recipe for strawberry cupcakes, from Yummy Cakes from Lynn, discovering [through extensive online research] a few tips/adjustments for baking at high altitudes [that’s why I’m calling this post ‘getting high (altitude) on cupcakes!].

La Paz, Bolivia, can be a great example of how frustrating it might be for a rookie baker! In order to remain in good terms with my kitchen oven, ‘we‘ decided to go for this ‘new & improved first-timer’ cake (batter) step-by-step: 😮

Flour: Increased by 2 Tbs per cup of batter

Baking Powder/Soda: Decreased by 1/4 tsp per tsp of mix

Sugar: Decreased by 2 Tbs per cup of mix [we’re always advised to go light on the sugar here, it’s healthier and better for the body’s blood pressure…]

Milk: Increased by 2 Tbs per cup of mix

Extra egg: added one more to the usual 3

Oven Temperature: Increased by 25 degrees

Baking Time: Decreased by five minutes per 30 minutes of baking time.

It looks like a lot of math, right? Adding this, subtracting that…. raising the oven temperature, decreasing the baking time… But it all makes sense – you’re looking for a less ‘runny’ cake mix/batter, and with  hotter oven, it’s logical (!!) to leave your ‘lovies’ in there for less time. At the end, it’s all about a great deal of TLC! ♥

Curious about the results?

Take a look, and let me know how you think the bake sale went with the ‘highest cupcakes I’ve ever baked’!

baking the strawberry cupcakes


Cupcakes filled with ‘dulce de leche’ (very popular in Latinamerica, similar to caramel)

decorating the cupcakes

Below, strawberry cupcakes, filled with fruit (jam) and topped with ‘bubble gum’ frosting [just came up with this recipe today… let me know if you’re curious about it!]

cupcakes topped with caramel

and lastly, a new version of the ‘margarita cupcakes’: lemon cake recipe, with light lemon frosting and of course, the mini-straws for the final touch! [again, another ‘creation from my kitchen’… happy to share the tips along!] 😮

¡Biénvenidos a la Escuela, con Salteñada! Images and Recipe.

School year just begun… nothing says “Welcome” better than a morning filled with fun activities for the whole family, topped off with typical (and delicious!) “salteñas!

Bolivia is known for its special kind of empanada called a salteña.  Oddly, the salteña takes it’s name from a city in Argentina (Salta), but it’s definitely a Bolivian specialty. You can recognize salteñas by the repulgue (the braid-like fold that seals the filling inside) which runs across the top of the pastry instead of along the side.

There are many varieties, but in general the meat and vegetable filling in a salteña tends to be runnier and sweeter (yet spicy) than most other empanadas. They are tricky and time-consuming to prepare, with traditional recipes calling for gelatin in the filling, so most salteña fans buy them from restaurants and street food carts. Salteñas are typically enjoyed as a mid-morning snack in Bolivia.

Salteñas are often served with a plate and a spoon, but expert salteña eaters know how to enjoy them without letting the juices run down their sleeves, by kind of pouring the liquid into their mouth as they take bites!! 😮

This slideshow requires JavaScript.

And here, the recipe for this delicious treat!

Filling – Ingredients:
1 cup lard or margarine
1 cup ground spicy red pepper (cayenne) mixed with water

½ tablespoon ground cumin
½ tablespoon black ground pepper
½ tablespoon crumbled oregano
1½ tablespoon salt
2 cups white onion, cut into small cubes
1½ cups green onion, finely chopped
3 pounds lean meat, cut into small cubes
1 cup potato, peeled, cooked, and cut into small cubes
½ cup cooked green peas
¼ cup granulated sugar
½ tablespoon vinegar
½ cup parsley, finely chopped
2 spoonfuls unflavored gelatin dissolved in 3 cups water
½ black olive per salteña
3 raisins per salteña
1 slice of boiled egg per salteña

Preparation:

  1. In a casserole add the margarine and the spicy red pepper. Set to boil over high heat until the margarine separates from the pepper. Next add cumin, ground black pepper, oregano, and salt. Let cook for ten minutes over low heat so that the mixture does not stick. Stir constantly. Next add the white onion and let it cook for five more minutes. Finally add the green onion.
  2. Remove the casserole from the heat, add the sugar, vinegar, parsley, potato and cooked peas.
  3. In another casserole add the three gelatin cups. Let it cook over high heat and as soon as it starts to boil, add the meat. Mix quickly and remove from the heat.
  4. Mix the first preparation with the gelatin and meat. Let it cool in the refrigerator one night or until it thickens. If wanted, add the olives, raisins and egg before it thickens or add them directly on the dough when preparing the salteñas.

DOUGH
Ingredients:

12 cups flour
1½ cups lard or margarine (boiling)
6 whole eggs
½ cup sugar
3 teaspoons salt
2¼ cups lukewarm water (more or less)

Preparation:

  1. Sift the flour in a bowl and add the boiling lard or margarine. Mix quickly with a wood spoon. Let it cool for a few minutes and add the eggs, the sugar and lukewarm water with salt. Knead until getting a dry dough. Cover the dough with a kitchen towel  and let it rest for ten minutes.
  2. Divide all the dough into fifty small balls and thin them out one by one with a roller, until getting round-shaped pieces (about ¼ of and inch thick by 5 inches of diameter).
  3. On each round-shaped piece put a spoonful of the filling with the olive, raisins and egg, if these ingredients were not mixed before.
  4. Dampen the edges of each piece with water, fold each one and join the edges very well so that each salteña is closed perfectly. Leave the closing on top.
  5. Put salteñas, on a backing sheet sprinkled with flour. Place each salteña separate from the next one.  Bake them at a high temperature (European oven: 300 C.; American oven  572 F.) between seven to ten minutes. Serve them warm.

NOTE 1: If desired, paint salteñas before baking them. In a frying pan add 6 spoonfuls of lard or margarine, 2 spicy red peppers (ground), 4 spoonfuls of water and a teaspoon of salt. Mix the ingredients and cook them over low heat until the water evaporates. Remove the mixture from the heat and paint eachsalteña with a kitchen brush. NOTE 2: If desired, you can substitute meat with chicken, or you can combine both.

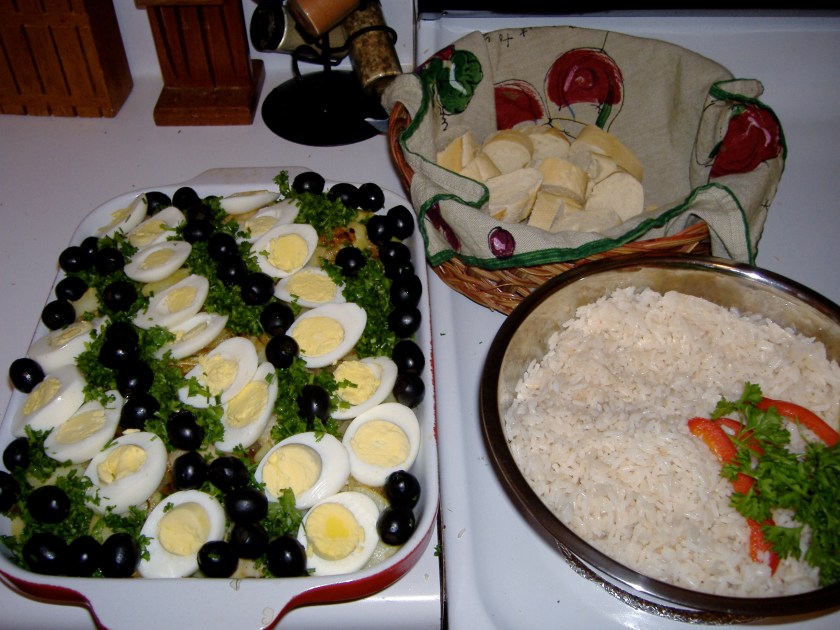
Preparing for Easter Sunday! Bacalhau a Gomes de Sa (Portuguese Codfish)

Although I may be able to take credit for the photo, the “execution” and recipe belong to my mother, and to her Portuguese heritage. For the past ten years, I’ve been promising my husband I’ll make, one day. One day… not today… not yet! [smiles!]

Bacalhau à Gomes de Sá is essentially a casserole of cod, potatoes, eggs, olives, olive oil and onion. It is a speciality from the northern city of Porto, being today popular throughout Portugal, and is considered one of Portugal’s greatest bacalhau recipes.

Suggestion for a delicious Easter Sunday, or in good Portuguese: “Domingo de Páscoa”… Sharing my mother’s favorite recipe: Portuguese Codfish – Bacalhau a Gomes de Sá… Got a lot of positive feedback when I first published this recipe, that, I’m getting it out – again, now, as a great suggestion for Sunday’s luncheon! Showing the deepest appreciation to my Portuguese heritage… thanks, mom! 😮

**********************

Originally published:

Although I may be able to take credit for the photo, the “execution” and recipe belong to my mother, and to her Portuguese heritage. For the past ten years, I’ve been promising my husband I’d make it one day. One day… not today… not yet! [smiles!]

 Bacalhau à Gomes de Sá is essentially a casserole of codfish, potatoes, eggs, olives, olive oil and onion. It is a speciality from the northern city of Porto, being today popular throughout Portugal, and is considered one of Portugal’s greatest bacalhau recipes.

Origin of the name
Gomes de Sá was the son of a rich nineteenth century merchant, in Porto. The family fortune dwindled and the son had to find a job at the famous restaurant Restaurante Lisbonense in downtown Porto, where the well-known recipe was created.

 Bacalhau à Gomes de Sá

“É um prato alourado no forno, formado por uma mistura de lascas de bacalhau amaciadas em leite, batatas cozidas e um refogado ligeiro. É enfeitado com ovo cozido, salsa e azeitonas”.

Alguns pratos tradicionais da culinária recebem o nome de seus criadores. Este é o caso do bacalhau à Gomes de Sá, tradicional receita portuguesa deste peixe, de autoria de José Luís Gomes de Sá, falecido em 1926, e na época cozinheiro do Restaurante Lisbonense, no Porto, lugar em que criou a receita. Sua receita tradicional propõe que o bacalhau seja cortado em pequenas lascas marinadas no leite por mais de uma hora. Assado no forno, com azeite, alho, cebola, acompanhando azeitonas pretas, salsa e ovos cozidos.

Este é um prato típico da região Norte de Portugal. É de preparação simples e relativamente rápida.

O bacalhau à Gomes de Sá foi um dos candidatos finalistas às 7 Maravilhas da Gastronomia portuguesa.

Gomes de Sá era um comerciante do Porto nos finais do Séc. XIX. A ele se deve esta receita de bacalhau que, segundo a lenda, terá sido criada com os mesmos ingredientes (à excepção do leite) com que semanalmente fazia os bolinhos de bacalhau que deliciavam os amigos. Com efeito, os ingredientes são os mesmos, mas a receita resulta de uma confecção cuidada e de grande requinte. A receita que se segue é retirada de um manuscrito atribuído ao próprio Gomes de Sá que terá dado a receita a um seu amigo, João, com a deliciosa nota: “João se alterar qualquer cousa já não fica capaz”
Receita em Portugues:

3 Porções

  • 400 g Bacalhau
  • 500 g Batata
  • 2 Ovos
  • 1 dente Alho
  • 3 Cebolas
  • 0.35 g folhas louro
  • 1 ramo salsa em rama
  • Q.B. Azeitonas Pretas
  • Q.B. Azeite
  • Q.B. Sal
  • Q.B. Pimenta

Cortar o bacalhau em postas e demolhar durante 48 horas. Colocar panela ao lume com água e deixar ferver. Juntar o bacalhau, deixar cozer, retirar e lascar.

Lavar bem as batatas com a pele. Cozer em água, temperada com sal, retirar e deixar arrefecer. Pelar as batatas e cortar em camponesa.
Cozer os ovos (duros), arrefecer e picar.

Descascar os dentes de alho e picar e descascar as cebolas e cortar em meia-lua. Colocar um tacho ao lume, adicionar o azeite. Juntar os dentes de alho, as cebolas e as folhas de louro; deixar refogar lentamente. Temperar com sal e pimenta. Retirar as folhas de louro e guardar.

Colocar uma frigideira ao lume. Adicionar a cebolada e o bacalhau lascado e saltear. Juntar a batata e temperar com sal e pimenta. Colocar dentro de um tabuleiro, regar com azeite aquecido com alho picado e levar ao forno. Retirar e empratar. Decorar com salsa picada, azeitonas pretas e os ovos picados e servir.

And in English: (from EMERIL)

INSTRUCTIONS

Soak the cod in cold water to cover for 24 to 36 hours, changing the water occasionally, drain. Flake the cod into small pieces, removing any bones. Set aside. In a large sauté pan, over medium heat, add 1/4 cup of the oil. When the oil is hot, add the onions and the garlic. Season with salt and pepper. Sauté until slightly golden, about 6 minutes.

Preheat the oven to 350ºF.

Grease a medium ovenproof casserole dish with 1 teaspoon of olive oil. Season the potatoes with salt and pepper.

Spread half of the potatoes over the bottom of the prepared dish. Sprinkle half of the salt cod over the potatoes. Place half of the onion mixture over the salt cod. Top the onion mixture with more salt cod. Place another layer of potatoes over the top of the cod. Drizzle the entire pan with the remaining 1/4 cup of oil. Place in the oven and bake for 30 to 40 minutes, or until golden. Place on a serving platter. Garnish with the sliced eggs, olives, and parsley.

Yield: 4 to 6 servings

Spicy shrimp casserole with curry and coconut milk

Sunday is the best excuse for a great family lunch! Easy, quick, colorful and delicious!

I just started playing with the ingredients, trying different variations of the shrimp casserole, or Brazilian moqueca – a very popular dish among the members or our household, and responding to the husband’s request, here it is, “step-by-step”, or better saying, “image-by-image”… 😮

First, get all the fresh ingredients (or as fresh as possible, but hey, nothing against a convenient bottle of garlic powder!) together. The shrimp needs to be peeled and cooked. After being cooked, it could be stored in the freezer, if needed. Able to get a some organic vegetables (tomatoes, bell peppers, onions), as well, and they looked beautiful!

Sunday is the best excuse for a great family lunch! Easy, quick, colorful and delicious!

Where hot sauce and curry meet... heaven!

I just started playing with the ingredients, trying different variations of the shrimp casserole, or Brazilian moqueca – a very popular dish among the members of our household, and responding to the husband’s request, here it is, “step-by-step”, or better saying, “image-by-image”… 😮

First, get all the fresh ingredients together (or as fresh as possible, but hey, nothing against a convenient bottle of garlic powder!). The shrimp needs to be peeled and cooked. After being cooked, it could be stored in the freezer, if needed. I was able to get a some organic vegetables (tomatoes, bell peppers, onions), as well, and they looked beautiful!

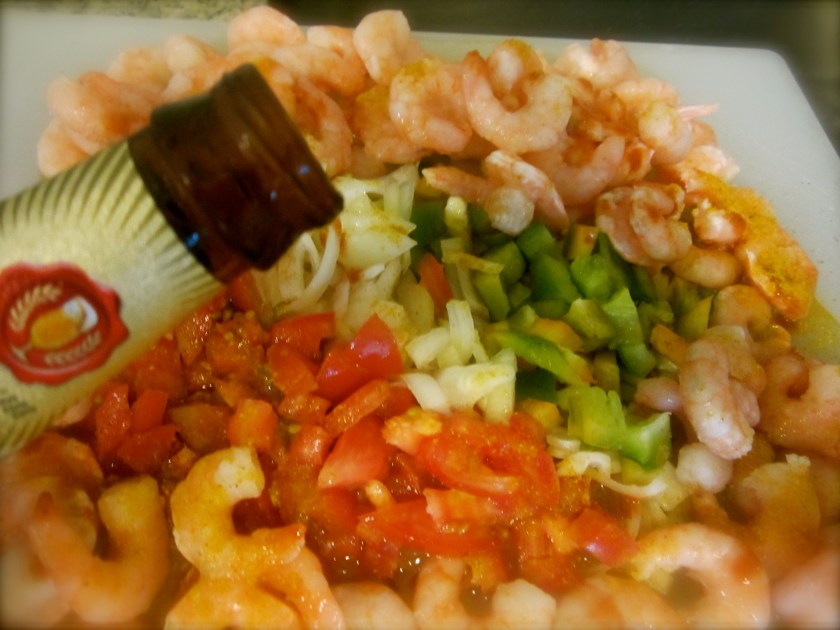
Starting with some heat… curry & hot sauce:

Can you see the heat in action? look at the color of these bad boys!

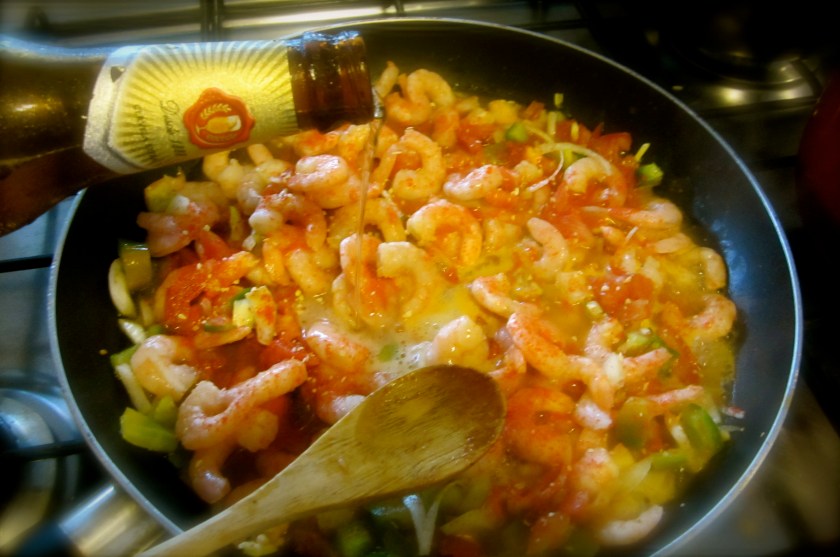
Adding a very important ingredient to the marinating mix: beer!

Simmering all the ingredients.. allowing for all the flavors to rejoice!

...don't forget to add a bit more "liquid" to the mixture...

Bringing in another surprising ingredient: coconut milk – very popular member of the traditional Brazilian cuisine!

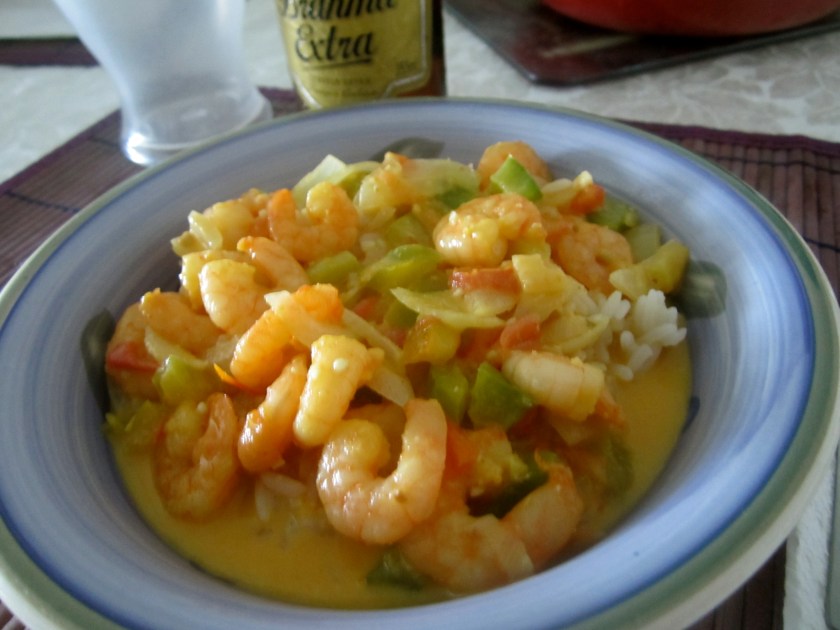
How should it look? Pretty much like this! 😮

Now, a quick look over the side dishes:

While you were working your magic with the shrimp casserole, rice was being cooked! It's simple like that!

Rice is done!

quick, easy, fluffy! like gradma's homecooking!

Another side order: organic veggies make a great and tasty salad!

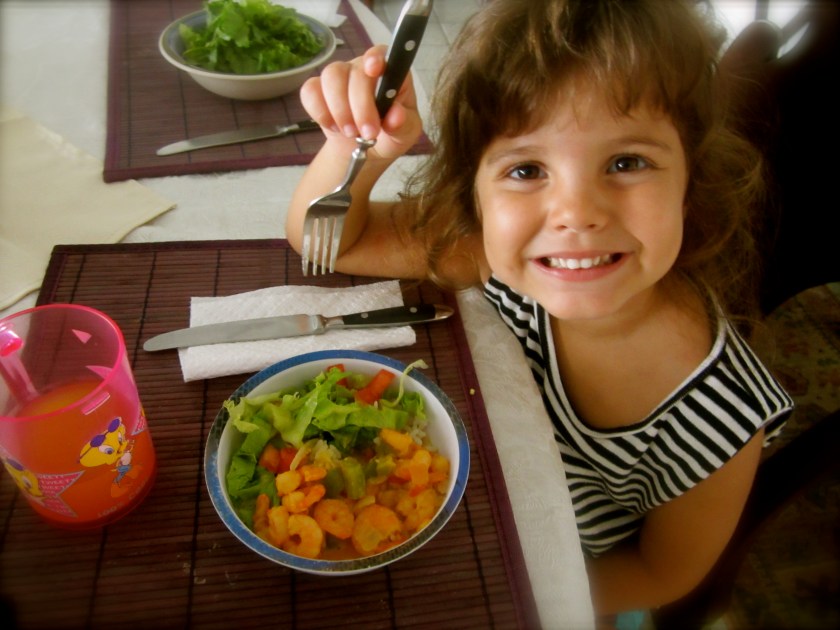
Husband’s plate: [accompanied by his ‘favorite’ cold drink!]

Two of my most demanding [and happy] customers! Happy Sunday!

“Cooking traditions from the heart”: great-grandma’s New England squash pie

During our time with family in the USA, one of the things I was being very attentive about, was learning from my mother-in-law some of her “secrets“, “cooking tricks” and delicacies, mainly from her dear New England origins…

Among the experiences, which included a 2-day process for making spaghetti sauce with meatballs and italian spicy sausages, stuffed shells, meatball subs, for the scope of this blogpost, I’ll restrict myself to my favorite desert for the Fall season: (New England) squash pie!

I keep following my mother-in-law around, trying not to miss a second from her teachings…

A quick snapshot of one of her well-cared “secrets”:

Once the recipe folder is open, she grabs a hand-written recipe from her own mother, and the rest, is just history! To make things easier, here is a simplified scheme for this delicious pie:

the golden beauties: pumpkin & squash

Ingredients

1 can ONE-PIE Squash
1/2 cup Sugar
1/2 tsp. Salt
1 tsp. Ginger
1/2 tsp. Nutmeg
1/2 tsp. Cinnamon
2 Eggs (beaten)
1 1/2 cups Milk or 1 can 12 oz. Evaporated Milk

Directions

Mix sugar, salt, & spices. Blend well into squash. Beat 2 eggs separately, add milk, stir well & blend into squash mixture.

Pour into 9″ pie plate lined with crust. Prehead oven. Bake 20 minutes at 425 degrees F.

Then bake for additional 45 minutes at 375 degrees F.

It looks pretty simple, right? Not really! 😮 I’ve got a lot of respect for this great-grandma’s recipe, and maybe, one day, I’ll be able to bake it as well as my kids’ grandma does!

For now, just cheers from our current tropical setting, longing for the flavors and tastes we were able to enjoy back home!